Gamify a New Object
Novigem tracks Opportunity, Lead, Task, and Event out of the box. From version 1.8.0 you can register any Salesforce object, standard or custom, and award points on it.
This guide covers the full path: register the object, enable it, write a rule, and connect a Flow.
The four built-in objects need none of this. Opportunity, Lead, Task, and Event work the moment Novigem is installed. Only add a Flow for objects beyond those four.
Steps at a glance
Register the object in Novigem Admin
Enable it for the rule engine
Create a rule in the Rule Builder
Build a record-triggered Flow that calls Novigem
Test it and check the ledger
Watch it instead
Same five steps, done once end to end in a live org. The walkthrough covers the Prior Record mapping in step 4, which is the setting that most often stops a rule matching later.
Prefer to read? The written steps continue below.
Before you start
You need:
- The Novigem Admin permission set
- Permission to change metadata in your org (Customize Application), because registering an object deploys a metadata record
- An object that record-triggered Flows can fire on
Users who earn the points need the Novigem User permission set and a Novigem licence. A permission set on its own is not enough.
1. Register the object
- Open Novigem Admin → Settings → General
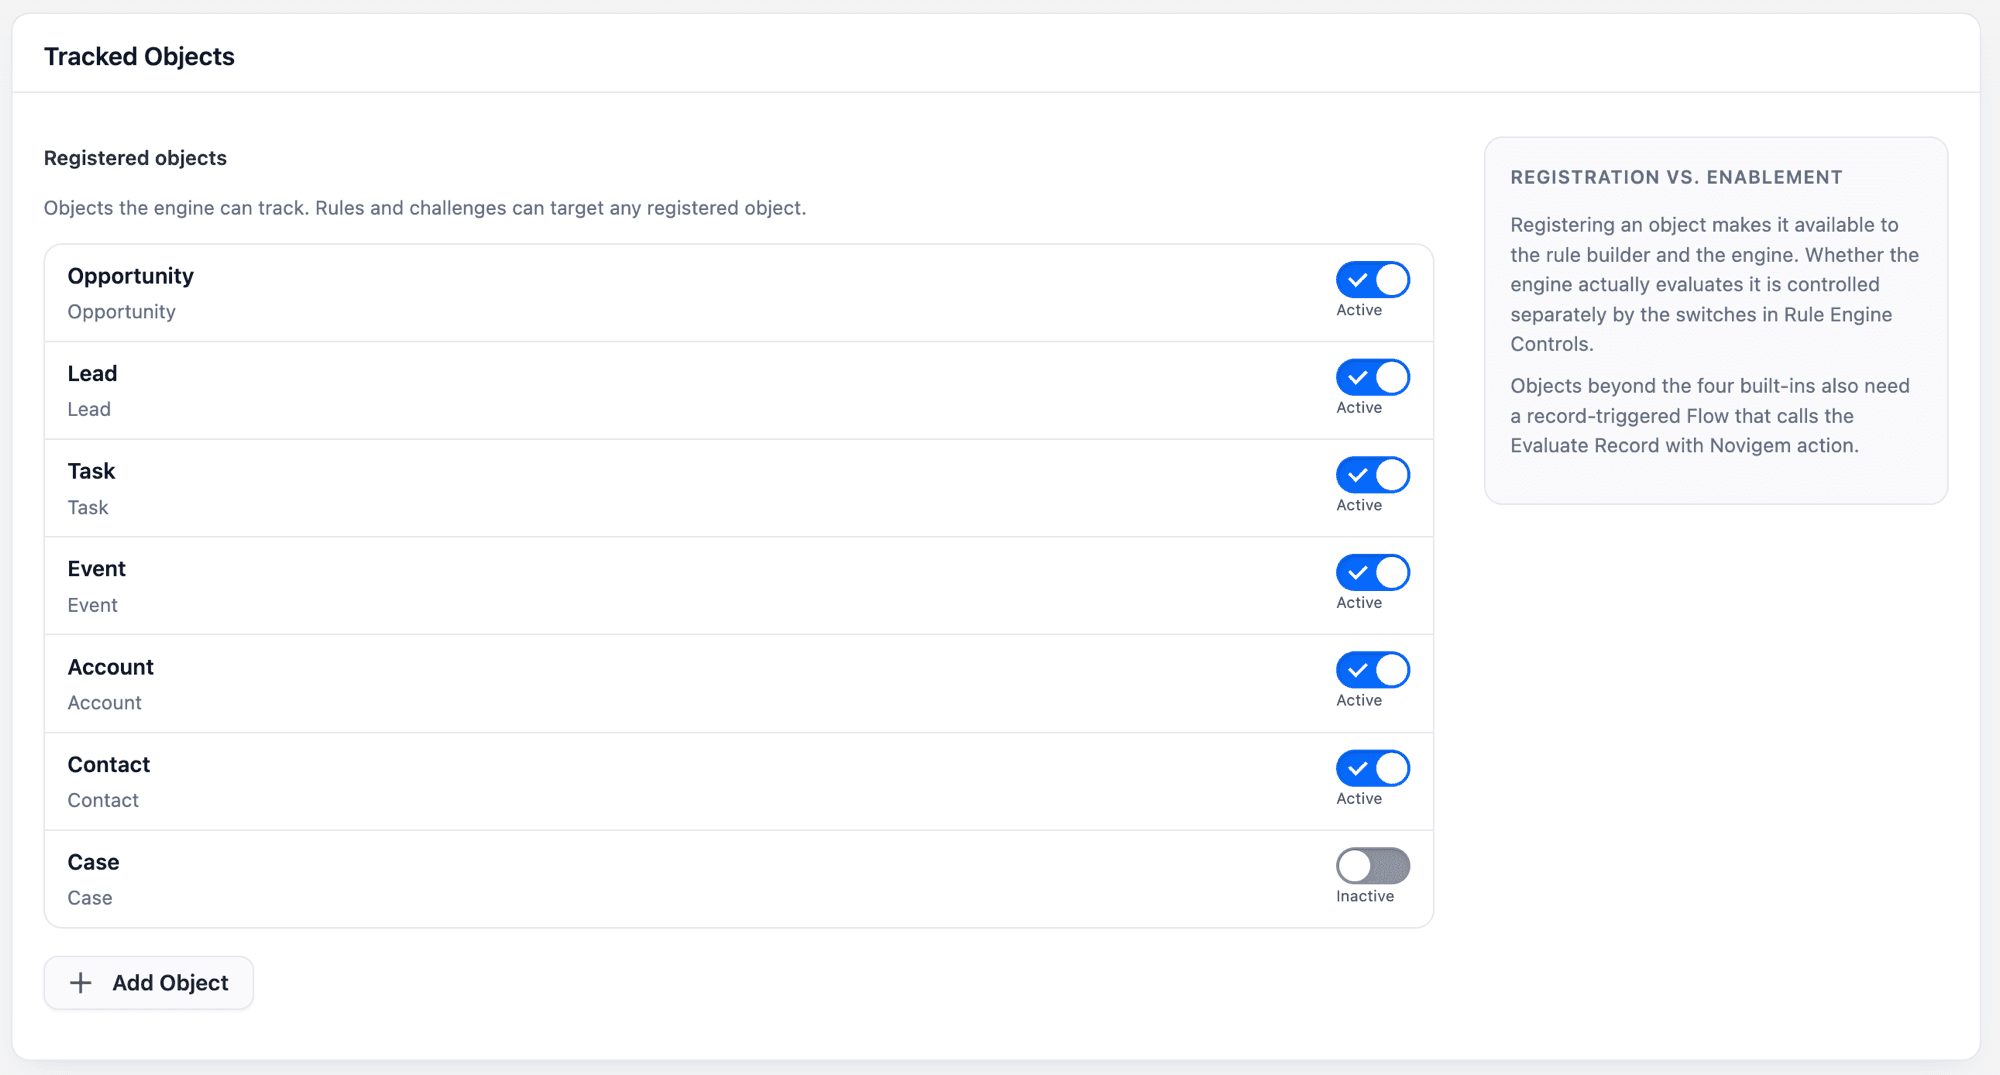
- Find the Tracked Objects card. It lists the objects the engine can track, starting with the four built-ins.
- Click Add Object. A panel titled Register an Object opens inline.
- Search for your object in the Object field. Results show as
Label (API Name), so you can type either. Only the first 50 matches are shown, so narrow your search if you do not see it.
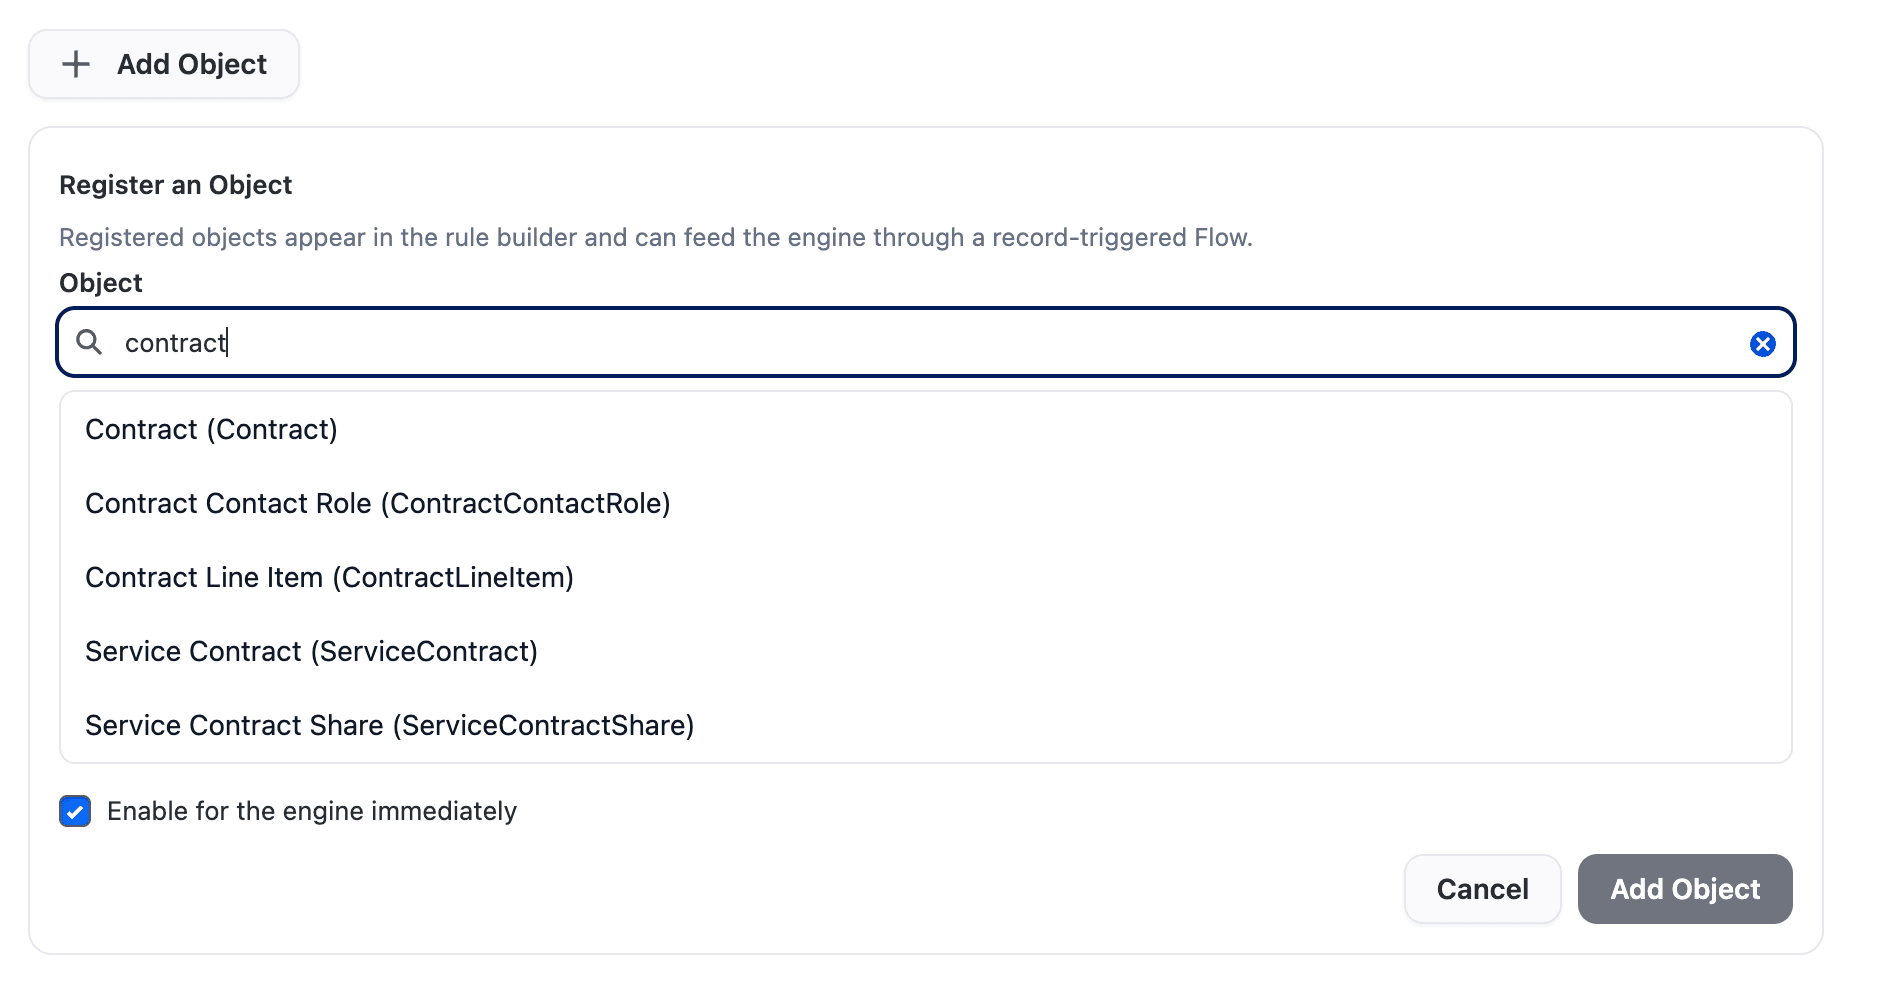
- Click the object to select it.
- Leave Enable for the engine immediately checked. This saves you doing step 2 separately.
- Click Add Object.
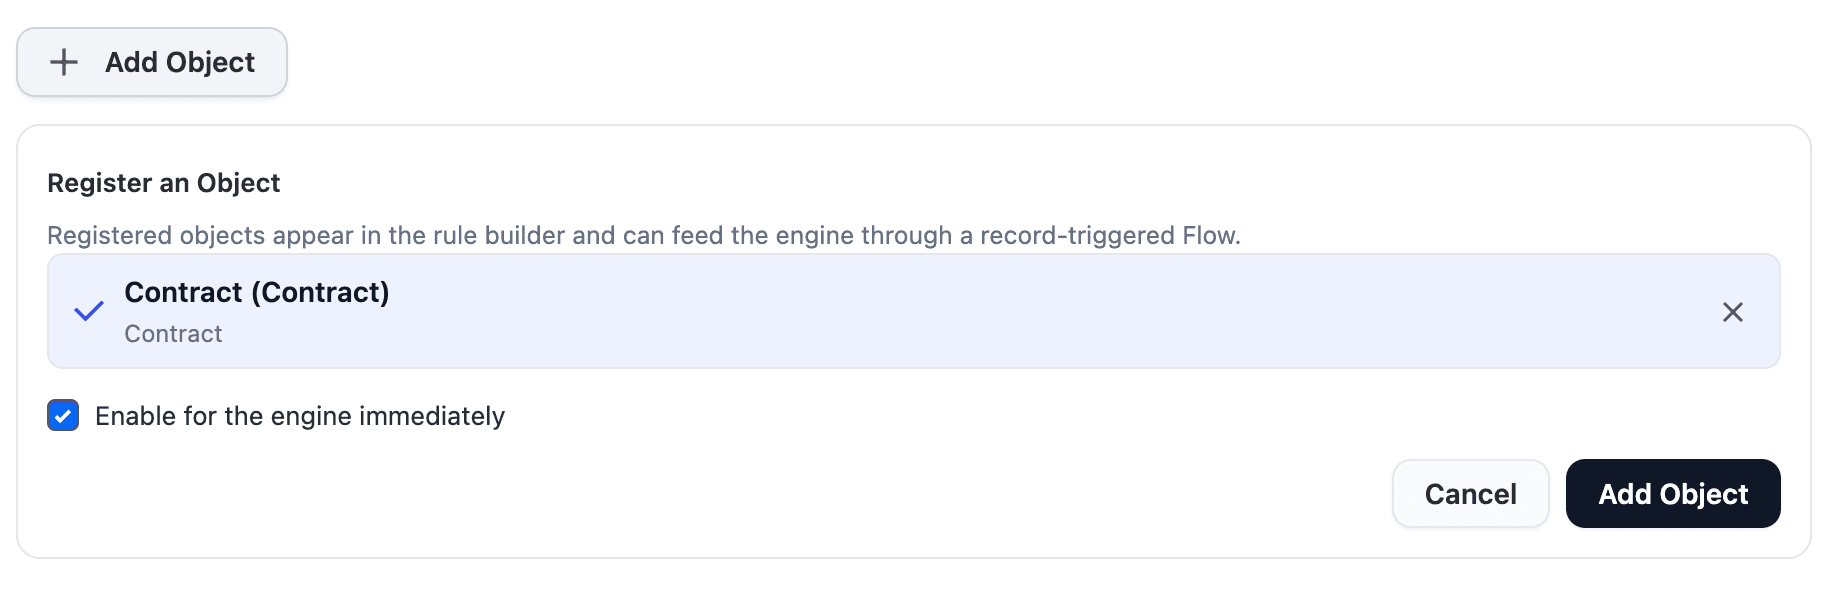
The change deploys in the background and the new object appears in the list within a few seconds, with its toggle already on if you left the checkbox checked.
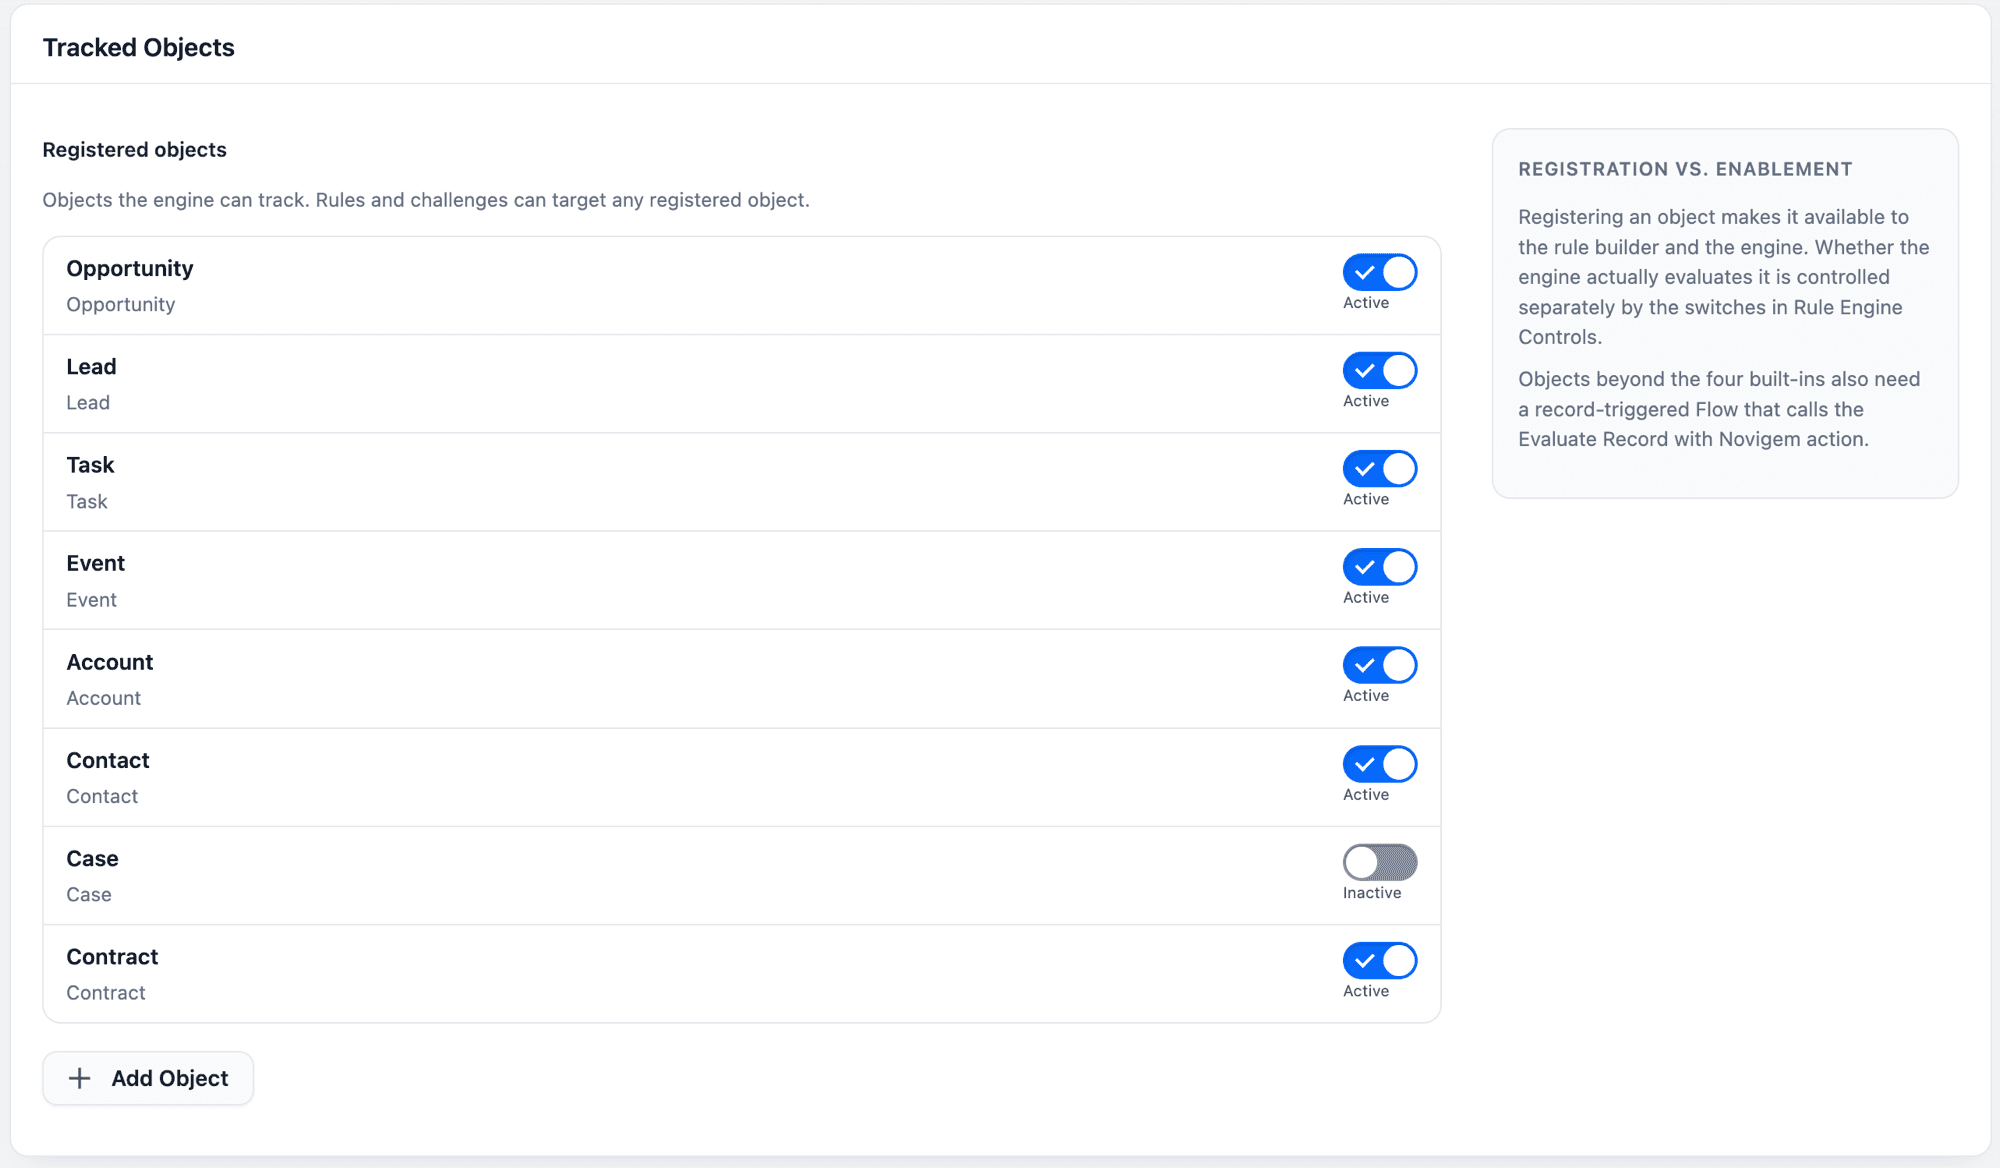
If the object has not appeared after about 30 seconds, refresh the page. If it is still missing, the background deployment failed. Check Setup → Deployment Status and confirm you have permission to change metadata.
2. Enable it for the engine
If you unchecked Enable for the engine immediately, the object is registered but the engine ignores it.
Turn on the toggle next to the object in the Tracked Objects card, then click Save.
Registering and enabling do different things:
| Action | Effect |
|---|---|
| Register | The object becomes available in the rule and challenge builders |
| Enable | The engine actually evaluates records of that object |
An object marked Not installed is registered in metadata but missing from this org, usually because the package that defines it is not installed.
3. Create a rule
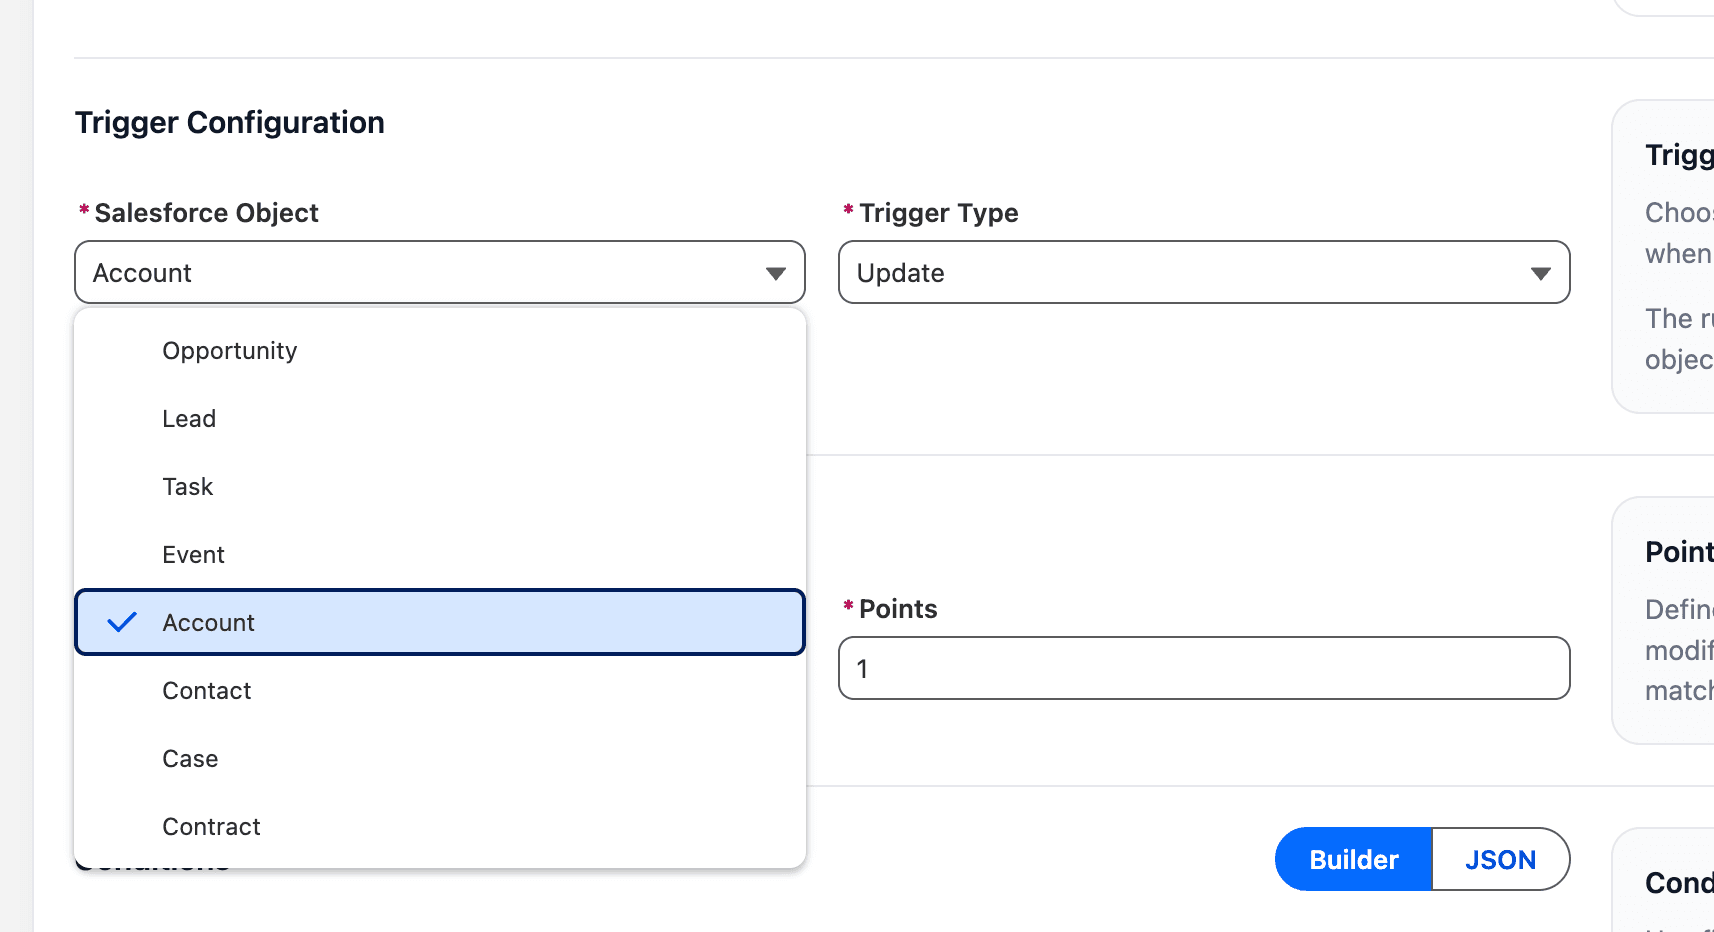
Go to the Rules tab and create a rule as usual. Your newly registered object now appears in the Salesforce Object picker.
Always create and edit rules through the Rule Builder. The underlying field is a picklist that only contains the four built-in objects, so editing a rule from the standard record detail page or a list view can silently break it.
One thing to watch when picking Award Points To: the Record Owner option reads the record’s OwnerId. Objects without an owner, such as master-detail children, have no OwnerId, and nothing is awarded. Use Created By or Last Modified By on those objects.
4. Build the Flow
Novigem ships Apex triggers for the four built-in objects. A managed package cannot put a trigger on your objects, so you connect them with a Flow instead.
- Go to Setup → Flows → New Flow
- Choose Record-Triggered Flow
- Set Object to your registered object
- Set the trigger to A record is created or updated, matching the trigger types your rules use
- Under Optimize the Flow for, choose Actions and Related Records. This is required. The engine only accepts after-save events.
- Add an Action element and search for Evaluate Record with Novigem, in the Novigem category
- Flow Builder asks for the object behind each input. Set Object for “Record” and Object for “Prior Record” both to your registered object.
- Set the inputs. Flow Builder shows the mapped values with friendly names:
| Input | Value | Shown as |
|---|---|---|
| Record | {!$Record} | Triggering [Object] |
| Prior Record | {!$Record__Prior} | Prior Values of Triggering [Object] |
- Save and activate the Flow
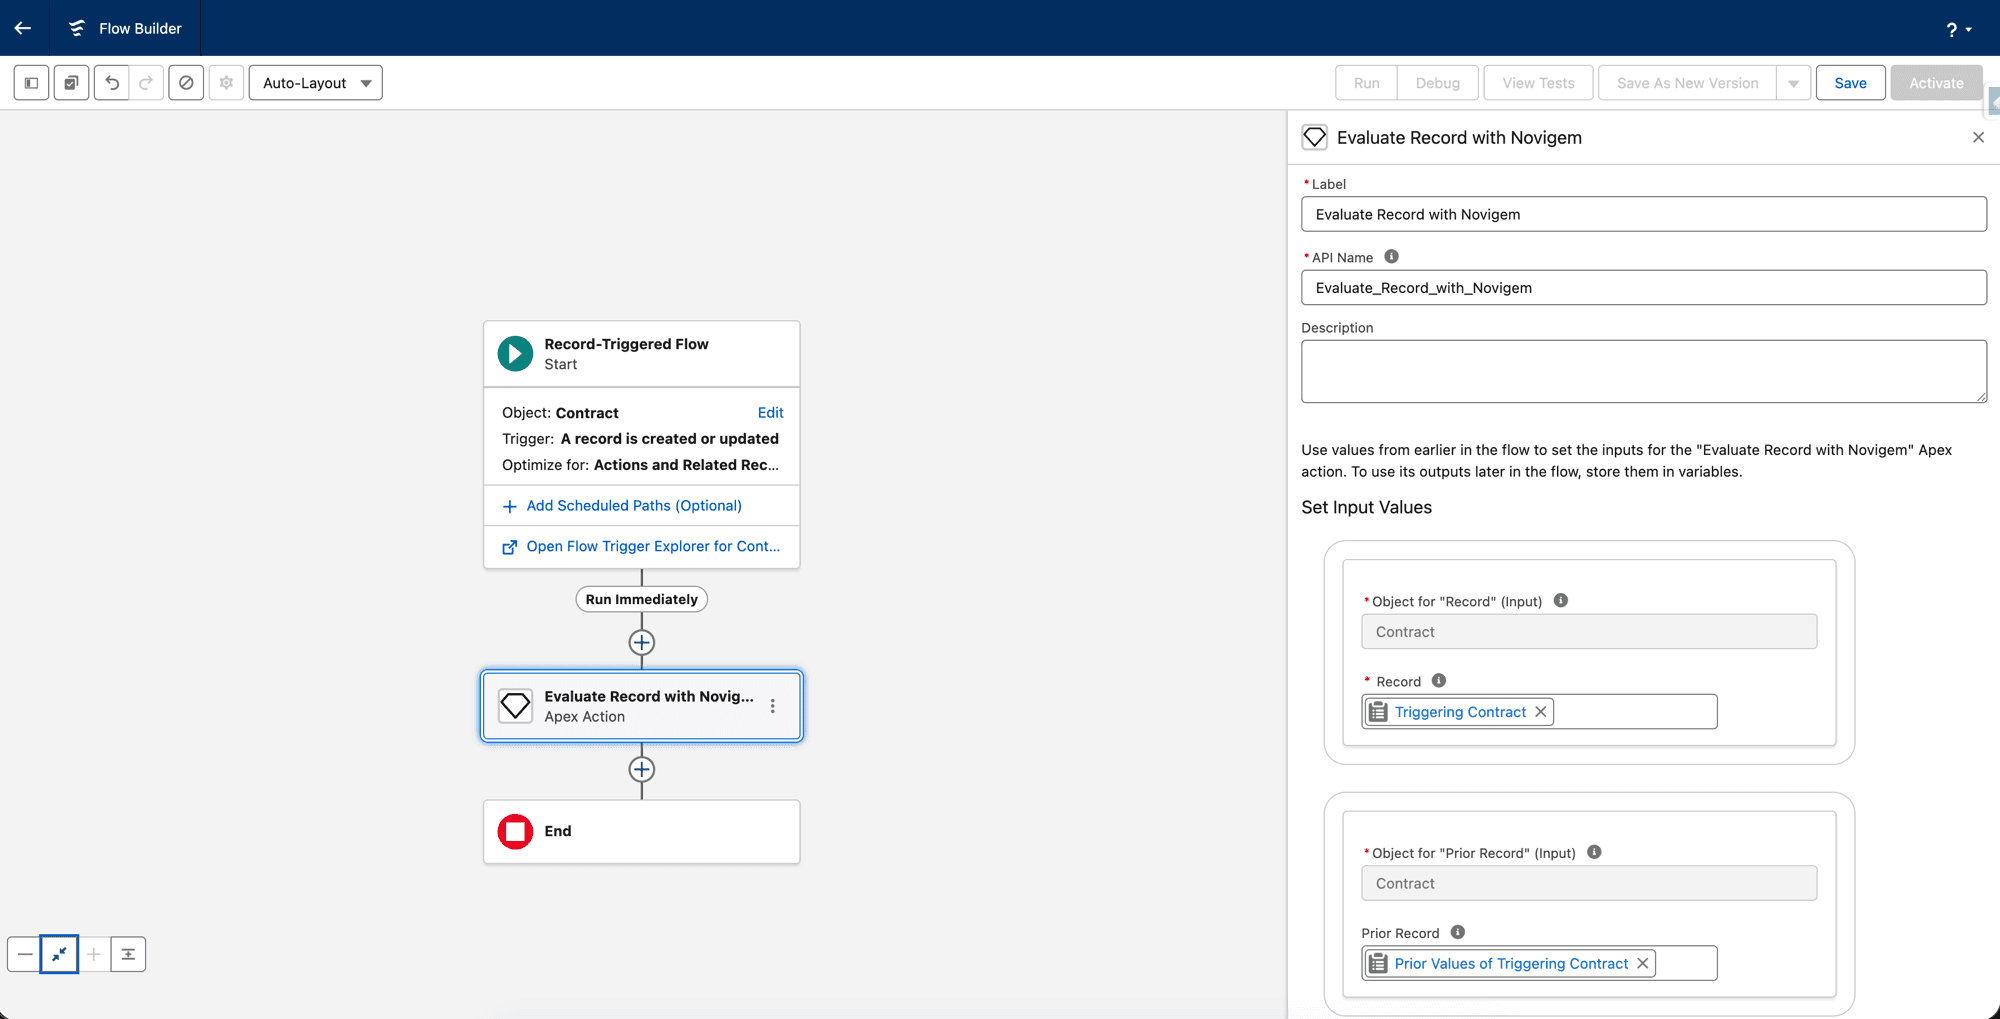
Map Prior Record even on a create-only Flow. Novigem works out whether a save was a create or an update purely from whether Prior Record is present. Leave it out and every update is treated as a create, which stops any “field changed” condition from ever matching.
Do not build a Flow on Opportunity, Lead, Task, or Event. Those already have packaged triggers, and a Flow would evaluate every save a second time.
Flow outputs
The action returns three values you can use in later Flow elements:
| Output | Meaning |
|---|---|
| Success | false only when the request was invalid, for example a missing record |
| Rules Matched | How many rule evaluations matched in the batch this record was part of |
| Error Message | Why the request was not processed, when Success is false |
A save where nothing matched still returns Success = true with Rules Matched at zero. That is the normal “no points this time” result, not an error.
Configuration problems never block the user’s save. They are reported on Error Message instead.
5. Test it
- Create or update a record of your object in a way that should match your rule
- Open the Ledger Entries tab
- Confirm an entry exists with the right user, rule, and points
If nothing appears, work through this list:
| Check | Where |
|---|---|
| Object is registered and its toggle is on | Novigem Admin → Settings → General |
| Enable Rule Engine is on | Same page, Rule Engine Controls |
| The rule is Active | Rules tab |
| The Flow is activated | Setup → Flows |
| Prior Record is mapped | The Flow’s action element |
| The user has Novigem User and a licence | Setup → Permission Sets |
Next Steps
- Rules reference: every field and operator in the Rule Builder
- Create your first challenge: turn rules into a challenge reps can complete
- Troubleshooting: common issues and fixes